Saturday, September 1, 2012

Nerd my Nails!

This weekend is the DOTA 2 International Tournament. People from around the world has gathered here in Seattle and Bellevue, Washington to compete. The prize: $1,000,000!!!!

I will be attending the finals on Sunday and as a show of support for the Tournament, DOTA 2, and Valve (which my husband works for) I decided to geek out my nails!

I decided to showcase the DOTA 2 symbol on my thumb and ring finger. Luckily the symbol looked easy to paint on. I went through my collection and dug up some black (China Glaze Liquid Leather) and red (Ulta Plum Street) polish.

I started with two coats of base coat since red tends to stain my nails. Then two coats of red went on next. Originally I had black on the thumb and ring finger thinking I could paint red on top but the red wouldn't show up so then all ten fingers started with red. On the three fingers that would not have the logo, I sponged on black very lightly, layering more at the tips. Using a fine tip artist brush I carefully painted on the logo with black. I was so worried that I was going to mess up, especially when I was painting with my non-dominate hand. The black border was sponged on making sure to use a crisp edge on the makeup sponge. Now I got my red box. Finished off with top coat!

I think they turned out better than I expected!!!

Now I better learn how to play the game!

Here's an added shot with my badge. It was one long and crazy tournament!
Can't wait till next year!!!


Saturday, August 4, 2012

My First Cosplay


San Diego Comic-Con!!! Can it get any bigger! 2012 was my first foray into cosplay...and it was soooooo much fun! I think I'm hooked!

Comic-Con starts on Thursday and goes until Sunday. I picked Saturday as the day to dressed up since that is the busiest of the four days and with Masquerade that night there were sure to be plenty of people in costume milling around. I started the day with a quick round of the main floor to buy a few things since I did not want to be carry "stuff" while in costume. I headed back to the hotel to get dressed. Really lucky that our room was right across the street from the convention center. Had an incredible view!  It took longer than I thought to get ready since I didn't know what I wanted to do with my hair. I thought I would let it speak to me as I curled and pinned. After a couple hours, mostly hair and make up, I was ready!

I was very glad this costume included pouches so I was easily able to carry a few essentials like safety pins, cash, my badge, and most importantly my phone. I now know to incorporate some kind of storage in all my costumes. Either usable pouches, a bag, or hidden pockets (with zip) inside jackets or capes. And to find a clever place to put the too important badge.

I didn't have to step out far from the hotel before people started asking for pictures. I do have to say there's a kind of thrill when people ask for your picture. I felt important, famous, almost like I was a celebrity! (but with the luck that I can easily shed off celeb status and return to normal)

Maneuvering through the floor was easy. Tried to step to the side when people asked for pictures but there were a lot of people so I ended up failing half the time. I received lots of compliments! I really appreciated them since this is the first time I've been able to display the field I am passionate in and went to school for.

I can't wait to get back home and start sewing my next project!

Oh I did learn one very important thing....wear toes pads in the heals! A lot of pressure on the toes with all that standing and posing.


Thursday, June 28, 2012

Steampunk!...Finally!

 I can't remember how or when I discovered Steampunk but since then I have been full blown obsessed! I still have a hard time describing to people what Steampunk is. So....

"Steampunk is a genre which originated during the 1980s and early 1990s and incorporates elements of science fiction, fantasy, alternate history, horror, and speculative fiction. It involves a setting where steam power is widely used—whether in an alternate history such as Victorian era Britain or "Wild West"-era United States, or in a post-apocalyptic time —that incorporates elements of either science fiction or fantasy. Works of steampunk often feature anachronistic technology, or futuristic innovations as Victorians might have envisioned them, based on a Victorian perspective on fashion, culture, architectural style, and art." (from http://en.wikipedia.org/wiki/Steampunk)

The whole culture is so fascinating but of course my favorite is the clothing. I think that's one reason why I love it so much. The people who participate really go all out in dressing up!

For the past couple years I have been wanting to design my own Steampunk costume. I just couldn't decide on a design or what character I should be. My head kept swimming with all these great ideas it's impossible to choose!

Since moving to the Seattle area I've heard whispers of a Steampunk con. I looked it up and it was in October, right across the street from where we lived. Talk about convenience! (more details about Steampunk-con... http://www.steamcon.org)

At the Con I purchased a bustle from Blue Moon Designs.(http://www.blue-moon-designs.com/Blue_Moon/home.html)
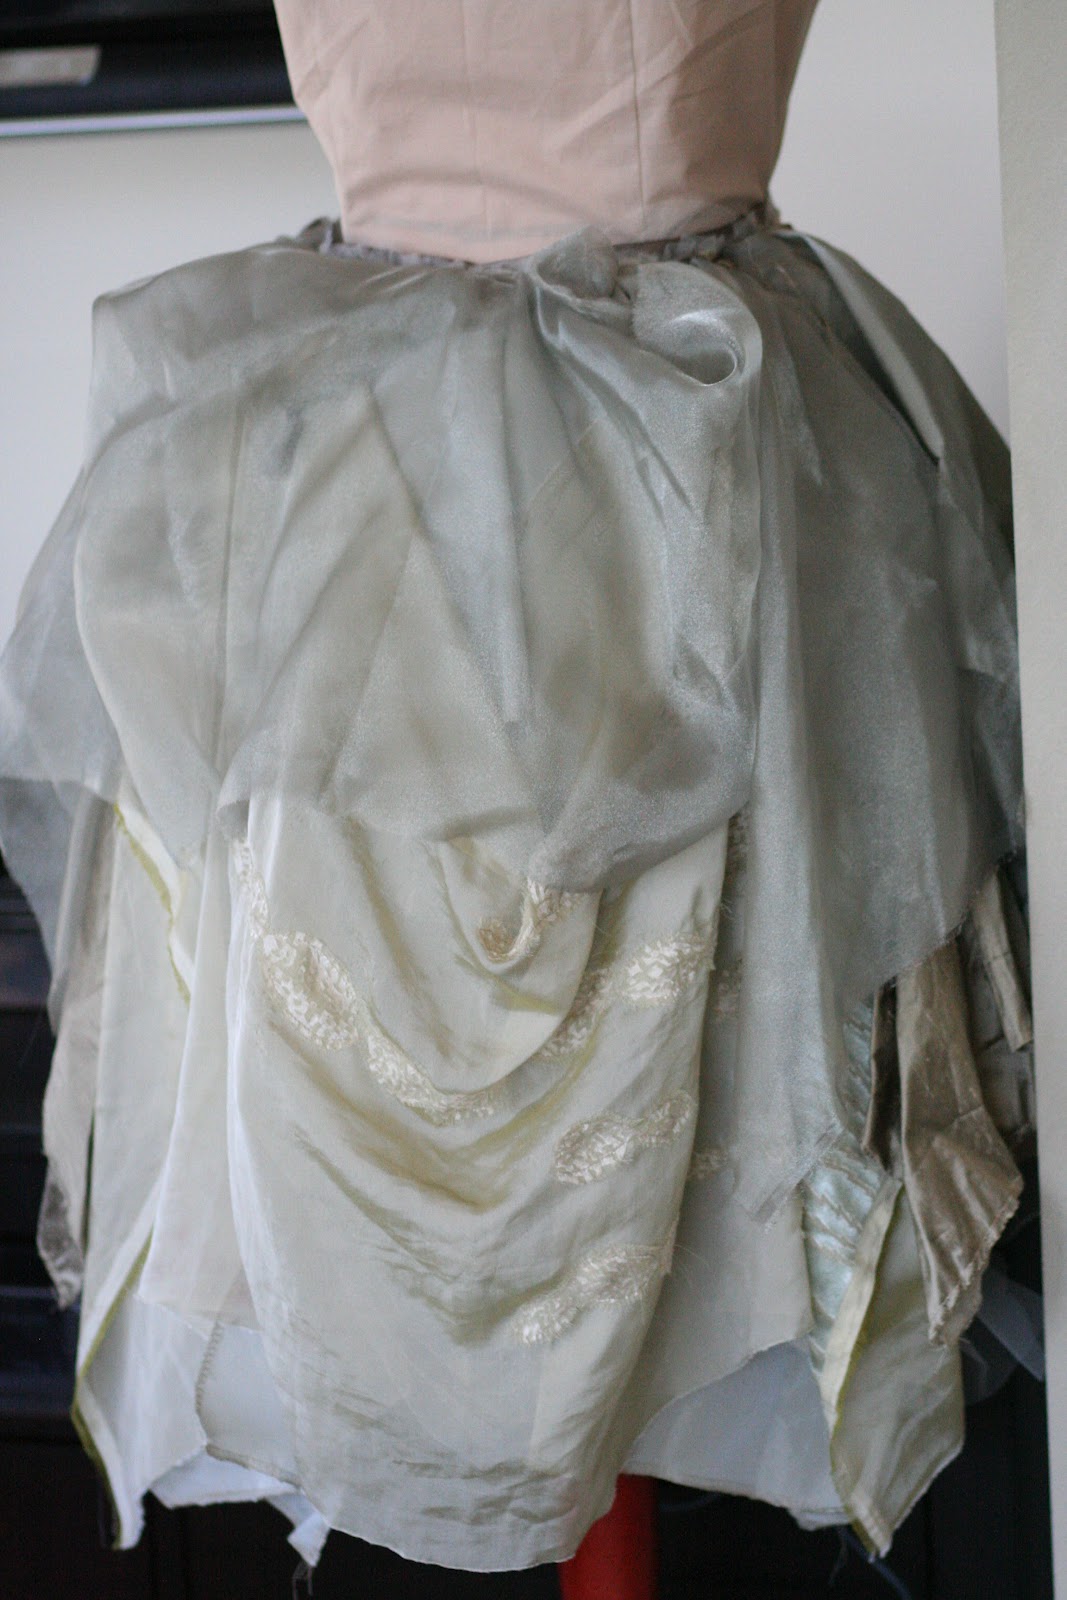
I was first attracted to it because it lit up and I'm a huge sucker for clothing that lights up (more about that another time) and I absolutely loved the color of the one I got...a hard to describe grayish green sage. I was thinking that eventually I will design an outfit to go with the bustle.

In April, I pulled out my brand new sewing machine and sewed a flower girl dress for my daughter. I enjoyed making the dress so much that I wanted to keep sewing. Comic-con San Diego was coming up and I had yet to go in costume. So here was my chance.
I was debating if I should go as a recognizable character or finally make a Steampunk outfit. I decided to go with Steampunk so that I would feel more comfortable since this will be my first time dressing up (plus I don't think very many people would know who Rose Petal was...she was the other choice).

I pulled out the bustle and started sketching ideas. Nothing was good. Then I got out all my Victorian books and patterns and just started piecing possibilities together. I put a picture of the bustle in my iPad and started sketching on top of it (such a handy little device!). And voila! I had a design! 

Now that I had my design it was time to go shopping...in my stash. I pulled out everything I had in coordinating colors and textures. And let me tell you, it's not easy shopping from my stash especially when it's in storage in the garage.

I spent several days playing around with fabric combinations, pinning and unpinning them on to my dress form. Decisions could only be made during the day since the colors shifted so much in different lighting.


I have been hard at work patterning, cutting and sewing, gluing and pleating. And of course stabbing myself several times in the process. I can't wait till it's all done. I have been documenting along they way so I will have plenty more to share!

Happy Sewing!


Saturday, June 2, 2012

Dessert now. Baby later.

This wasn't really crafted for wear...but the main material will be worn eventually!

Introducing the Diaper Cake! I made this for a friend who will be having her third boy! I figured she would already have most of the baby essentials. So what would every baby need?...Diapers!!! And a diaper cake is a much more fun way to gift diapers!

Most diaper cakes I see online look very fussy to me. Either they are loaded  with cheap plastic baby decorations or fake flowers. I wanted something simple, classic and sophisticated. I recently attended my sister-in-law's wedding where her mother had made gorgeous pinwheels for the bridesmaids to carry. (Lori, I think you should make more of those pinwheels and sell them on Etsy.) Since then I have been obsessed with pinwheels and behold they make the perfect decorations for a diaper cake!

The newborn diapers I used had yellow and green on them. I started with the lime green (I don't care much for yellow) and added navy blue for boy. (Who is tired of baby blue? I am!) I found the perfect ribbons easily. I had a difficult time finding the perfect colors in the paper but luckily there's a scrapbook store nearby and they had a wonderful assortment of double-sided paper!

The pinwheels are simply made. I used push pins for the centers of the topper. The smaller ones are held together with wire that has been twisted with a little bead on it. The diapers are wrapped around a center. A bit tricky to do but string and a stretchy rubber band helps. I've seen cakes where each diaper is individually rolled but I don't care for that look.

I really enjoyed making this cake! A tasty treat for the eyes now and something that a newborn baby will being wearing A LOT!!!


Friday, March 23, 2012

Arrows and Smoke

Sometimes I can get quite a bit obsessive....alright a lot obsessive! My latest obsession is The Hunger Games. I love the books and I'm really excited for the movie! And I am not the only one! There are a lot of people inspired by Panem! I have come across weddings, photo shoots, and crafts during my web browsing. And those people have inspired me!

Here are a couple projects I have finished just in time to wear to the movie. (Key word: Finish!)

I found a knitting pattern for arm warmers inspired by District 12. They looked cute and were easy to knit. I just started using double pointed knitting needles and wouldn't mind another project to practice on.
I used Cascade 220 yarn in a gray color. They didn't take long to knit...after I unraveled the first one twice. Once because they were to tight and the second time for more length. These arm warmers were also the first knitting project I blocked. I wanted the arrow design to lay flatter. I do have to add that blocking was interesting. I used the wet blocking method where I let them soak in warm water. The yarn gave off a burnt hair smell (it's 100% wool). It reminded me of textile class when we burnt fibers to learn the difference between animal and synthetic.

I'm very happy with the finish result. They will get at least three wearings (to each movie viewing) if not more. There's a spark of an idea for a Hunger Games costume in the back of my mind. If it comes to light I will have to incorporate these arm warmers as part of the costume. 


What would a franchise movie series be without the sea of merchandising tie-ins? And Hunger Games somehow found another obsession of mine...nail polish. China Glaze recently release a Hunger Games inspired collection called Capitol Colours. In the collection are twelve colors each representing a different district. Even if these colors were not tied in to the movie, they are still amazing colors.

I will search through the internet finding people who swatch nail polish colors so I have a better idea of what they look like before I buy them. I found one who created a design that I had to copy! Using the China Glaze Capitol Colours, Smoke and Ashes was applied as the base color. Then light coats of Riveting and Electrify were painted on the tips. Now it looks like my nails are on fire!
 I have since found more design I can't wait to try. Youtube is full of tutorials for "the girl on fire" nails.

This concludes my first full blog post!!! I can't wait to write another!


Arm warmer pattern came from this site:  http://www.darksideofthecovers.com/?p=186

Nail swatches and design can be seen at:  http://ommorphiabeautybar.com


Tuesday, February 21, 2012

A New Project

I have always thought that it would be fun to write a blog but due to a heavy dose of procrastination it has taken me years to sign up for one and 10 months to finally sit down and write my first post.

I hope that this new project will inspire me to create and FINISH many others. Especially, since I have a long list of projects written in a sketchbook...somewhere.

Stay tuned.....